10 Healthy Side Dishes Your Kid Will Actually Eat
Do you struggle with making healthy side dishes your kid will actually eat? Maybe you search the web for that perfect dish only to have your kid turn their nose up. In this post I’m sharing 10 of my favorite healthy side dishes that kids will actually eat. Even picky eaters have some side dishes on this list that they will enjoy.
This blog uses affiliate links. There is no cost to you to use the links. A small amount of commission is made from the affiliate links that contribute to keeping this blog up and running. This blog was recently updated in February 2024.
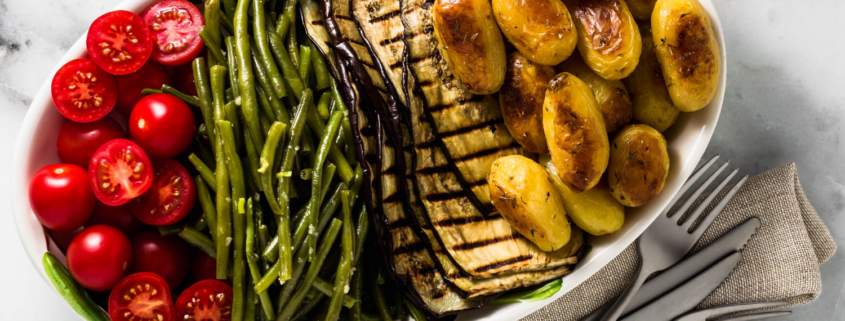
Roasted Baby Potatoes
I love these potatoes because they are easy to make and you can make them crispy on the outside which is what most picky eaters enjoy (crispy or crunchy). I use the baby yellow potatoes but you can also use the baby potato medley which includes yellow, white, purple blend.
I’ve also taken a whole potato and cut up into squares, mixed with olive oil, and popped in the oven. I like to get them crispy so there’s a nice crisp on the outside. This can help your picky eater enjoy them a little more.
I like to sprinkle with pepper before placing in the oven. Once cooked, sprinkle with sea salt. For some extra nutrition you can also sprinkle with nutritional yeast which are high in B vitamins. You can also use parmesan cheese or garlic powder for some extra flavor.
To see the healthy side dish recipe CLICK HERE.
Green Beans
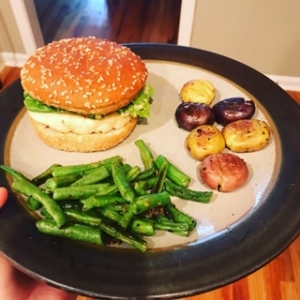
Green beans are another one of my favorite healthy side dish recipes to share. Starting out with organic canned green beans is typically what most parents introduce to their kids. Kids enjoy these green beans because they are usually more salty and easy to chew.
For some picky eaters, canned green beans can be too mushy and they will refuse them. If your child prefers crunchier foods, try using fresh green beans and roasting them or placing in the air fryer with some avocado oil, coconut oil, or olive oil and sea salt.
As a feeding therapist, I recommend introducing a variety of types of green beans early on when you are introducing foods to your little one.
This means serving green beans in a variety of ways. This will help your child learn that the same food can taste very similar even though it is presented in different ways. Often times, kids get stuck on eating a food the same way and have a difficult time eating a food if it looks different than what they are used to seeing.

Different Ways To Serve Green Beans
Canned green beans are great to start with because you can buy different types such as regular, no salt, with salt, Italian style, French style, or mixed into a green bean casserole. Fresh green beans can be cut in small pieces, long pieces, mixed with olive oil and sea salt, then with other seasonings, placed within casseroles, cooked in the oven or air fryer, etc.
See where I’m going with this? Look at all the different ways you can eat green beans! For the fresh green beans, I think it’s best to boil them for a few minutes to get them a little more tender. Then sauté them.
I also love to add seasoning. Don’t be scared to add seasoning to your toddler or child’s food. Especially if you have a child with low muscle tone because they often require more oral input from a sensory standpoint and seasoning can increase oral awareness. This means that adding seasoning can help your child feel where the food is in their mouth.
A few of my favorite seasonings are coconut aminos, garlic salt/powder, Everything But The Bagel Seasoning, and McCormicks Montreal Seasoning.
CLICK HERE to see the recipe.
Chickpea Noodles
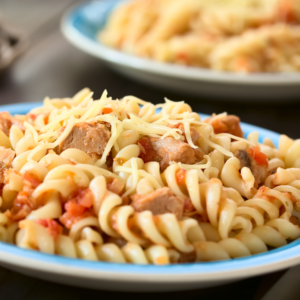
Sounds odd but I actually love to have chickpea noodles as a side. Most kids like noodles and most kids like them plain or with a little butter and parmesan cheese. I love the Banza or Barilla Chickpea noodles because they are made from chickpeas and full of great protein and fiber. They are also not as mushy and slippery as some noodles.
Fiber is something that most kids, especially picky eaters, just don’t get enough of. We need fiber to have a healthy gut, keep our bathroom trips regular, to stay full, and balance blood sugars.
These chickpea noodles have a mild flavor and a little firmer texture than your typical noodle. I like to add in some plant butter or olive oil, garlic salt, nutritional yeast or some vegan or regular parmesan, and serve as a side.
Toss your noodles in whatever your child likes and enjoys. Let your child sprinkle on some cheese or toppings that they like. These noodles also come in different styles such as rotini, penne, and spaghetti noodles. To introduce, pick a noodle that is close in shape to what your child already eats so they are similar in appearance.
HERE and HERE are the brands we like to use for chickpea noodles.
Chickpea Rice
There are lots of different types of rice out there. Some taste great and aren’t filled with the best ingredients, but your child might try these first. That’s okay, because if they try it a couple times then you can eventually move towards a more healthier or homemade option. Think of it as a gateway.
When we were first trying to expand variety I bought whatever I thought my kid would eat. Honestly, I didn’t care what was in it because I wanted the experience to be good and I wanted my child to have a chance of at least trying it. Once I had my kids eating rice then I started moving in the direction of healthier options.
If you are a health conscious parent and have a very picky eater then please take a few minutes and read my post HERE on how your own relationship with food and “health” can impact your child’s eating. When I changed my mindset is when we started making progress with eating more variety.
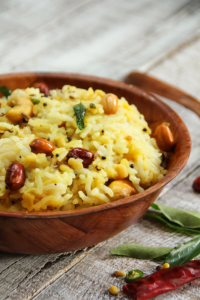
I love the RightRice HERE made from vegetables. It comes in different flavors which is great for expanding variety of food for your child.
I also love Banza Chickpea rice HERE made from chickpeas.
HERE is the Lundberg white rice pilaf we love too.
These are easy healthy side dishes that include veggies, protein, and a good amount of fiber.
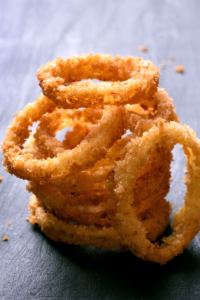
Air Fryer Onion Rings
I LOVE LOVE my air fryer. One of the best gifts I’ve gotten and I love to use it for making easy side dishes. It cooks anything and I love the way it makes food crispy on the outside. We are gluten and dairy free so I’m always on the hunt for food finds that taste good and aren’t full of too much junk. I love finding healthy side dishes with vegetables in them too.
Mainly I want to find some quick, healthy, allergy friendly foods that my kids actually enjoy. I enjoy cooking but sometimes want something easy I can throw in the air fryer or oven and call it a side. You can definitely make your own onion rings by slicing down onions into rings, dipping into eggs, then coating with Ian’s GF bread crumbs.
Ian’s also makes really good GF onion rings. They are found in the frozen food section along with other onion rings and fries. I pop these bad boys into the air fryer and they come out crispy and so good. A good treat to have every now and then. Plus, any veggie I can get into my kids is a step in the right direction.
You can find Ian’s HERE
Air Fryer Zucchini
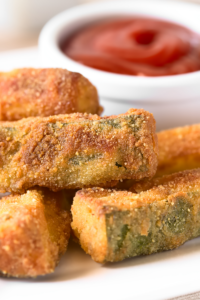
Any healthy vegetable side dishes that I can make I’m gonna give them a try. My kids, and honestly most kids, don’t like mushy food. Mushy vegetables are the worst and remember most kids prefer a food with a crunch so I decided to take some zucchini I had in the fridge and put it in the air fryer.
I’ll share the ingredients and instructions below but first I wanna share a couple reasons why I like this healthy side dish for kids. It’s made from fresh cut zucchini so it is going to have a little crunch to it. You want to cook it enough so it’s tender but still has a crunch when you bite into it.
I also love it because I created a super simple, gluten free and dairy free coating so it will give the outside a crunch too. Almost like you were frying it in oil but just in the air fryer. Plus, zucchini has a mild flavor so when you add in your seasoning it doesn’t have a strong veggie flavor you would likely get when you make something like brussel sprouts.
I like to cut into strips and call them fries but you can cut into circles and other shapes too. You can also do this with green beans or squash too. Even the grocery store has some fried green beans that you can buy already breaded and just place in the air fryer. They aren’t gluten free but for those that aren’t worried about gluten you may want to try those first then make a homemade batch.
Ingredients or Air Fryer Zucchini
1 fresh organic Zucchini (cut into half then cut lengthwise)
1/2 cup gluten free bread crumbs (I buy gf panko crumbs)
1/4 cup gf flour (I use King Arthurs GF measure for measure flour)
1-2 eggs (you can also use Just Egg or 1 tbsp ground flax with 3 tbsp water as egg substitutes)
1/4 cup unsweetened almond milk (If you don’t have any on hand it’s totally okay to make this optional or use whatever milk you have)
Seasoning of choice (I like 1/4 tsp garlic powder, sea salt, and pepper. McCormicks Montreal seasoning is great too)
A little olive oil to coat your hands
Instructions
Wash of zucchini and cut in half then cut into strips lengthwise.
Place egg(s) in bowl with plant milk (optional) and mix.
In another bowl, place GF bread crumbs, GF flour, and seasoning of choice.
Dip zucchini in the egg mixture first then in the flour mixture. If you like extra breading then dip back in egg mixture and then back in flour mixture.
Place zucchini strips in the air fryer. Put some olive oil on your hands and pat each piece of zucchini so it has a little oil on the top. This will help it crisp up even better.
Turn the air fryer on 400 and cook for about 12 minutes. You may want to flip half way through but this isn’t a must. I have a thing about making sure both sides are nice and crispy so I flip half way.
Sprinkle with some sea salt when done. These are great with your favorite dipping sauce such as
Gluten and Dairy Free Mashed Potatoes
I remember very clearly the days when the only type of potato my then very picky eater child would eat was fries. They had to be a certain type of fry and he would not budge on eating if it looked different than his “typical” fry.
If you are a parent of a picky eater, and especially an extreme picky eater, then I know you KNOW this struggle all too well. As a feeding therapist, we did a lot of food chaining which really helped us expand variety on the foods he already liked.
I knew he loved fries and knew I could eventually bridge to mash potatoes but it would take a lot of patience, time, consistency, and exposure. We eventually got to where he was eating a variety of fries. Different brands of fries, different seasonings, shapes such as wedges, curly fries, tator tots, hashbrowns, then worked our way to baked potato skins, baked potatoes, then finally mashed potatoes.
These are simple and super easy to make. Mashed Potatoes are one of the healthy side dishes that are great to be able to make because you can really have them with any meal and they are yummy.

Ingredients for Mashed Potatoes
2 Organic Russet Potatoes (peeled and chopped)
1/4 cup unsweetened plant milk (you can also use avocado or olive oil drizzle in place of milk)
2 tbsp plant butter
Sea Salt and Pepper
Instructions
Peel and chop potatoes. Place into a pot of water and bring to a boil.
Once boiling, turn down to a low boil until potatoes are soft enough to break through with a knife or fork.
Once ready, drain liquid and keep potatoes in the pot.
Add butter, sea salt, and pepper. Mix with a handheld mixer. Slowly start to add in plant milk and keep mixing until smooth and creamy.
Tip: Most picky eaters are going to prefer potatoes to be smooth and without all the lumps. Making sure to cook the potatoes well will help break down any lumps. As kids get used to the mashed potatoes then you can start to introduce them to mashed potatoes with skins in the mix, more lumps, etc.
Also, have some favorite toppings on the table too so your kids can add them to the mashed potatoes like a potato bar.
Raw Vegetables With Dips (The healthy vegetable side dishes Queen)
I think we forgot about simplicity sometimes. I’m famous or throwing some raw cut up veggies on a plate or even in a cupcake pan and calling it a side dish. For those that have kids that aren’t fans of veggies this is a great way to expose them to veggies in a fun and nonpressuring way.
I like to take a cupcake pan and pick some thinly sliced baby carrots, sliced celery in thin sticks, sliced cucumbers (sliced in sticks), radish chips, and some dips like ketchup, ranch, and/or hummus. You can even do a chocolate dip! Ketchup seems crazy but my daughter loves ketchup and will dip any and all veggies into it.
If there is a dip that your child enjoys don’t be afraid to put the dip into one of the cupcake holes. It will make it more appealing! Of course, you don’t have to use the cupcake pan but it is a fun way to present the food to kids. Fruits and veggies can be placed on a plate in the center of the table too. You can also just place them on each plate as a regular side dish when serving dinner too.

Extra Ideas For A Vegetable Side Dish Plate
Feel free to add in some fruit and maybe some pretzel sticks. Raw fruits and veggie are super simple and it’s one less thing to cook. It really cuts down on cooking time in the kitchen.
Even jicama sticks are great. They are white, stick shaped, crunchy, and not a lot of flavor. When dipped into a dressing, they taste like the dressing. You can find them in the produce section at your grocery store.
Place in the middle of the table. At our table, we have a rule that everyone has to take a food and put it on their plate but it’s up to each person whether they want to eat it. If you have a child that may gag or throw a fit if something gets close to their plate you may want to just have the new foods in the center of the table and work your way up to them starting to be able to tolerate it closer to their plate over time.
Roasted Snow Peas
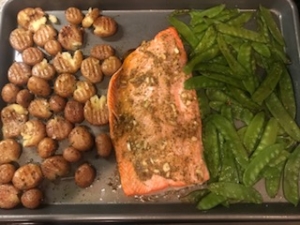
These can be made with snow peas or sugar snap peas. My kids like to pop the little pea out of the shell. These are super easy and can be placed in the oven while you cook the rest of your meal. They are also great to throw on a sheet pan with other items and roast all together. CLICK HERE for more sheet pan dinner ideas.
Ingredients For Snow Peas
1 bag of fresh snow or sugar snap peas
1 tbsp olive oil
Zest from 1 lemon
Juice from 1/2 lemon
Instructions
Preheat the oven to 375.
Place snow or sugar snap peas on a sheet pan. Sprinkle with olive oil, zest of one lemon, and lemon juice. Sprinkle with a little sea salt and pepper.
Cook for about 12 minutes.
Cucumber Salad
One of my kids loves cucumbers. We were at my parent’s house one weekend and my Mom made a cucumber salad with cucumbers, tomatoes, and vinaigrette dressing. She picked the cucumbers out and gave them to my youngest who gobbled them up. This is by far one of the easiest healthy side dishes to make.
I love cucumber salad but for some reason never thought to make it as a side or even think about adding the dressing for a little zing. Now we have it on the regular and my daughter loves to have it with her school lunch.
What I like about this idea is you can just use cucumbers. You don’t have to make it fancy and add in a bunch of other veggies if you don’t want to. But if your child likes other veggies then I would recommend adding in some or giving your child a choice like “do you want zucchini or peppers in the cucumber salad?”
I also like to cut up raw zucchini and place in in the salad with cucumbers. It’s a very mild flavor veggie with crunch and similar in color to cucumbers so it’s a great veggie to bridge to next.

Ingredients
1-2 cucumbers chopped
Favorite Italian or Vinaigrette dressing (I love Aldi’s brand of House Vinaigrette or Ken’s Simply Vinaigrette dressing)
Optional: Add in sliced grape tomatoes, baby bell peppers chopped, chickpeas (drained), chopped zucchini, feta cheese (if dairy free you can use vegan parmesean cheese which is great too)
Instructions
Wash and chop cucumbers. I like to chop into fourths instead of just in half but you can do either way.
Chop any extra veggies.
Pour about 1/4 cup dressing over veggies and mix. If adding feta or vegan parm then go ahead and sprinkle on top.
Set in fridge until ready to serve. This stays in the fridge nicely for about 4-5 days.
If you enjoyed this post and want more healthy recipes, tips for helping your kids eat more variety, and simple solutions to help you be the healthiest version of yourself for your family then don’t forget to follow me on Pinterest or join my Health Hacks with Lindsay Gantt FB group.







Leave a Reply
Want to join the discussion?Feel free to contribute!